Monday 26 October 2015

Averland war of succession part 2 - Battle of Pfungzig - Pike and Shotte

With the indecisive first action of the war, on the outskirts of Pfungzig, the forces of Baron Kastor Leitdorf  retired back inside the town, while the vanguard of Hardenburg's marines returned to re-group with the rest of the column. Both sides having re-grouped Kastor set out to engage the advancing Hardenburgers. The two armies met just outside Pfungzig, ready to fight for the fate of the town.

For this battle we used Pike and Shotte rules, using the Pavia armylists the represent our Imperial armies. The armylists were as follows


The Hardenburg Marines

- Seneschal Pietr, grandmaster of the knights of the Black Bear, General of Hardenburg - CinC

Knights' Brigade - Chaplain of Ursun - Brigadier
- Knights of the Black Bear - gendarmes

Household Brigade - Captain Karayagin the Kislevite - Brigadier
- Greatswords - gallowglass
- Outriders - reiters
- Hellblaster volley gun - medium artillery

Militia Brigade - Warrior priest Yann the Bold - Brigadier
- City spearmen - pikemen
- City handgunners - arquebusiers
- Averlander rural peasants - militia
- Rocket battery - light artillery


Averlanders under Baron Kastor Leitdorf

- Baron Kastor Leitdorf on Griffon - CinC & mounted men at arms

Knights Brigade - mounted captain - Brigadier
- Knights of the Blazing Sun - gendarmes

Heavy Infantry Brigade - Raimund Leitdorf (Kastor's Nephew) - Brigadier
- Greatswords - gallowglass
- Spearmen - pikemen
- Halbediers - pikemen
- Fire wizard - medium artillery

Swords Brigade - Leitdorf (Kastor's brother and Raimund's father) - Brigadier
- Swordsmen - Swordsmen
- Crossbowmen - arquebusiers
- City garrison - militia
- Saker gun - heavy artillery
- Battle wizard - heavy artillery


The battle started with a general Hardenburg advance. The Black Bear knights advanced towards their opposites while the greatswords moved to take up positions in the centre. The Hellblaster opened fire on the heavy infantry brigade, but the long range shots missed their targets.

On the right the spearmen advanced into the orchard, while the handgunners made their way up to the wall around the fields. On the otherside of the fields, the rural peasants miss interpreted Yann's orders to support the spearmen, instead advancing up their left towards the enemy artillery.

On the left the knights of the Blazing Sun moved towards the Black Bears, so that an imminent clash seemed inevitable.

With the Hardenburg militia advancing through the orchard, the Leitdorfs' swordsmen marched forward into the fields, while the crossbowmen raced half way across the fields. To their right Kator's gun fired on the rebellious Averlander peasantry.

Yann's brigade continued their advance into the fields, the spearmen entering the orchard, as the peasants moved forward. Finding their rockets out of range, Bernardo Belletto (Hardenburg's master of experimental artillery) supervised the rocket crew in moving their battery forward.

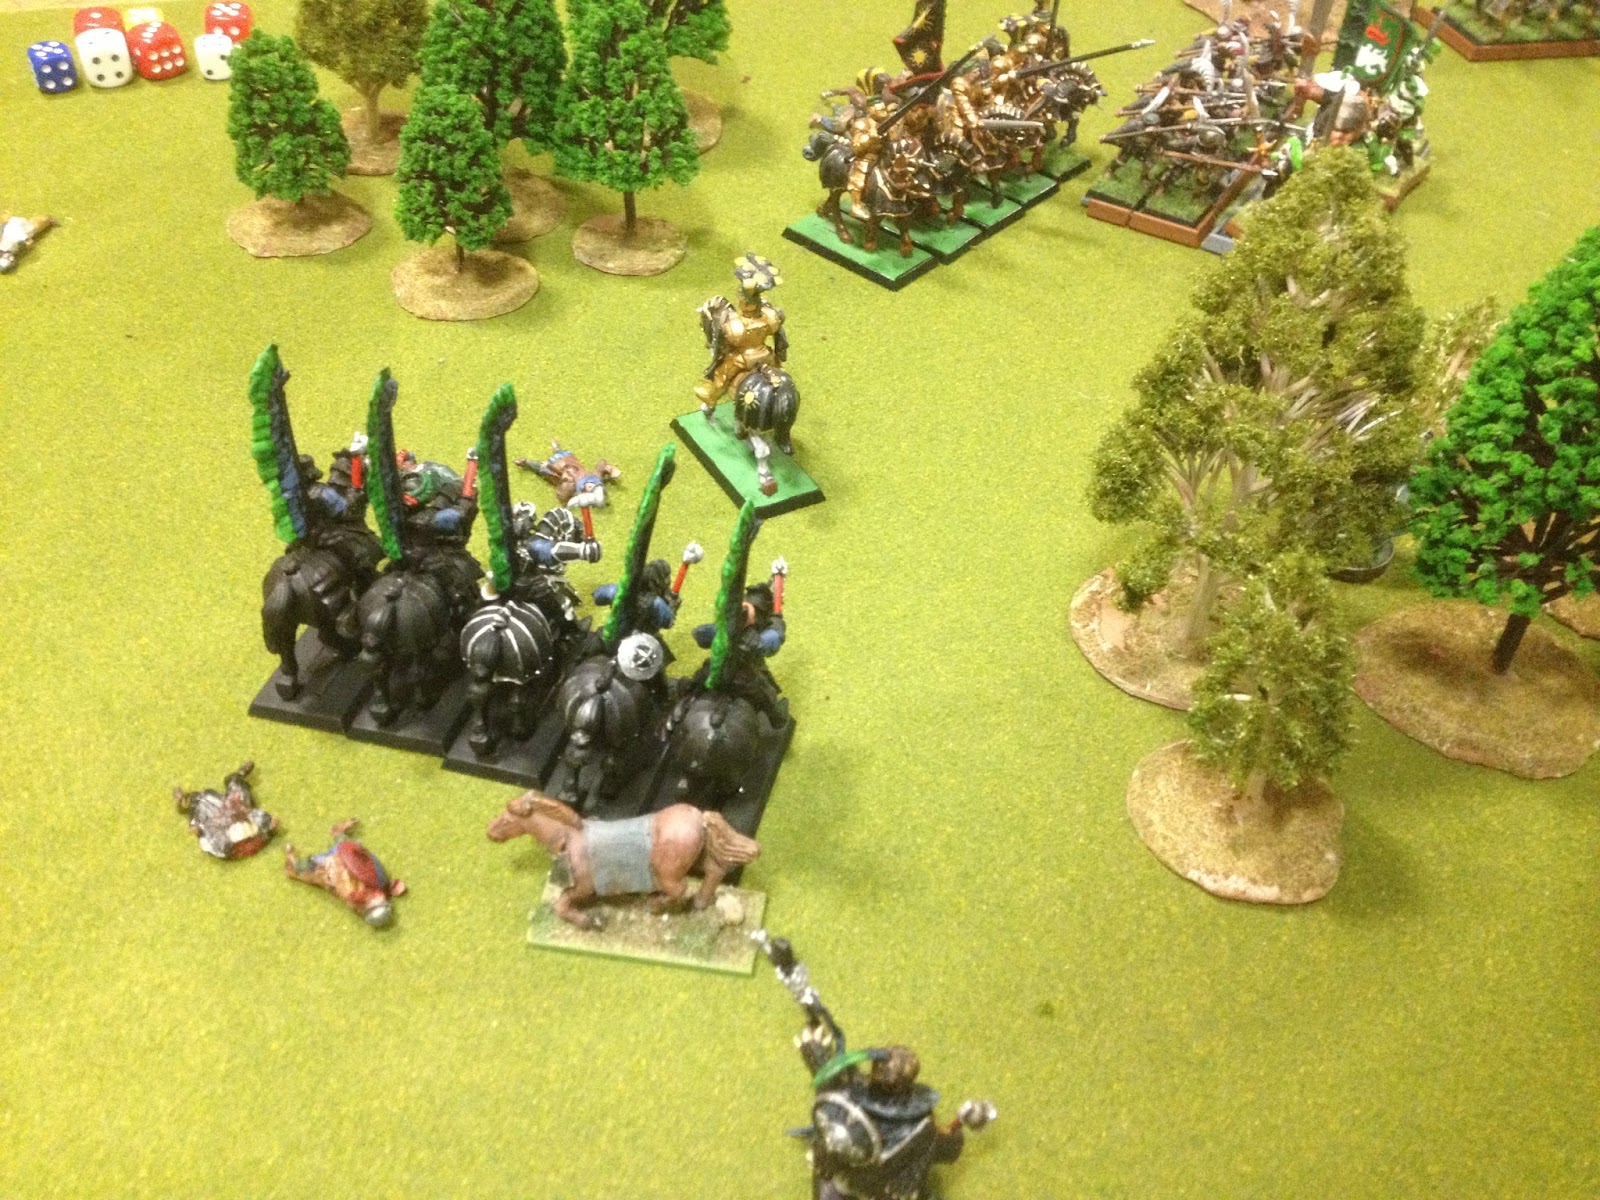
Lowering their lances and raising their hammers, the knights of the Black Bear charged forwards, the knights of the Blazing sun moving forwards to counter charge them. The two lines clashed in a crash of metal, while the second line of Black Bear knights and a unit of Outriders, from the household brigade, supported the fight.

The fight, which had seemed so in the Black Bears' favour, ended in a rather unexpected fashion. The unit on the Blazing Suns' right smashed the opposing Black Bears out of the way and made contact with their supporting unit, throwing them back too. However by this point they had taken so many casualties that they themselves had to put back too. In their centre however the Blazing Suns were thrown back by the Black Bears who beat them again and pushed them straight back beyond the woods.
The fight left both sides with heavy casualties, but the Black Bears were much worse off than had been expected. The Blazing Suns' counter-charge had been more or less a success.

With the centre unit of the Black Bears so far forwards, the Blazing Suns, lead by their brigade commander, moved in for the kill.

In the fields the fight had also started. Leitdorf's swordsmen dashed across the cropfields and into contact with the gandgunners, taking closing fire from the Hardenburgers. As the troops advanced the Averlander battle wizard brought down a blast on the spearmen in the orchard.

Having surrounded the Black Bears' lead unit, the Blazing Suns destroyed the group, sending any survivors packing.

Having recovered from Leitdorf's counter attack, the greatswords began to push forwards in the centre (Karayagin personally leading them, having rallied the unit after it took a blast from the fire wizard). On the left the Outriders made a wild charge into the Knights of the Blazing Sun, while the Hellblaster opened fire on their commander's unit, disordering them.

With their brave charge the Outriders sent the knights packing, though they themselves broke as a consequence. The Black Bears slowly began to advance forwards again, while the Blazing Suns reeled from their recent blows.

Approaching the Pfungzig garrison, the Averlander rebels charged forward. The peasant supporters of Leitdorf and Von Alptraum clashed in a fierce combat (for which both sides received the 'bad war' rules), but the townsmen had the best of it and broke the rural peasants.

By some incredible feat of combat the handgunners, having been forced back by the Swordsmen in the previous round of combat, stood firm as the Swordsmen charged again and somehow managed to break them in the fight!

But meanwhile, in the orchard, the other unit of Swordsmen had charged into contact with the Hardenburger spearmen (now personally lead by Yann the Bold), supported by the Pfungzig militia. The fight appeared as if it would be one-sided, but all was still to fight for on the right.

 On the left the Blazing Suns had reformed on the left of Reimund's heavy infantry brigade. In an attempt to dislodge them a unit of the Prince's greatswords and the lead Black Bears charged their position. The Blazing Suns counter-charged the Black Bears, but the Black Bears smashed apart the unit, sending the knights into flight.

The greatswords too achieved success, breaking apart the Averlander spearmen, and coming face to face with the last Knights of the Blazing Sun.

In a feat of defiance, the spearmen under Yann in the orchard, somehow managed to break the opposing swordsmen, sending them running back through the ranks of the Pfungzig militia. By a remarkable fortune the assault by the swordsmen units on the right had been beaten off by the Hardenburg city troops.
With the last round of bloodshed, the army of Hardenburg seemed to have the upper hand.

However, with the greatswords now forward and exposed, the knights and Averlander halbediers charged in. The prince's guards were flanked and broken, however the casualties sustained by the knights were enough to send them from the field too!

Charging into the fray, Kator Leitdorf on his griffon, swooped down into the approaching outriders, ripping apart the unit! But would it be enough to close the gap...

At this point the battle ended, and losses were considered.
Pietr had lost 1 unit of knights, 2 of outriders, 1 of greatswords and 1 of Averlander rebels, while Kastor had lost 3 units of knights, and their brigade commander,  2 of swordsmen and 1 of spearmen (5 units broken to 6 and a commander). Kastor had had a brigade completely destroyed, while much of the household brigade had also been destroyed. Taking this into consideration the battle was declared a Hardenburg victory, though a close one, with heavy losses on both sides.

Grand master Pietr had won the first battle of the campaign, which, while being close, was nevertheless decisive. Having taken Pfungzig the merchant council in Hardenburg would be sure to allow (through financial support) the Prince's invasion in support of the Von Alptraums. It was too early to tell which way the war would swing, but the men of Hardenburg could now be hopeful it would not end before it had started.

Having been wounded in the first action, a few weeks before, Kastor had had a bad day, despite early success in beating back the Black Bear's supported charge, the battle had gradually swung against him, and now he was being forced to retire. It was a blow, but it would probably not decrease his support among the nobles, and may even increase it amongst the western urban population. However the door had been open for a Hardenburger invasion of the east which may well see an increase in support for the Von Alptraums amongst the rural peasantry of the east.

After the victory outside Pfungzig, the Hardenburger marines invested the town, while Kastor and his force headed back along the road towards Bieswang. Meanwhile the Grand Army of Hardenburg, having crossed the river and awaiting the fall of Pfungzig, set out for Grezstadt: the home of the knights of the Black Bear...

by B

Saturday 17 October 2015

Wars of the Roses - Ambush in Coombe Abbey Woods - Lion Rampant

Sir Thomas Malory, the accredited of the romantic tale Le Mort d'Arthur, was in January 1450 accused of having ambushed the Lancastrian Humphrey Stafford, Duke of Buckingham, that year returned from Calais, in the woods of Coombe abbey in Warwickshire, together with 26 other armed men. Malory had previously been a member of parliament for Warwickshire, but was at the time holding one of Buckingham's seats, however he was still very closely connected to Richard Neville, Earl of Warwick, and the other Warwickshire nobility. The charges were never proved, but he went on to be accused of all manner of crimes. He was at last brought to trial in 1451, by a court in Nuneaton in the heart of Buckingham's power and was sent to prison in London. He escaped but was back in prison a month later, but bailed for 200 pounds by the Warwickshire nobles. He was imprisoned twice more (for the first one escaping and being recaptured yet again!), and at some point during all his prison stints he wrote Le Mort d'Arthur about King Arthur and his chivalrous knights.
 

Our game was based around this ambush of the Duke of Buckingham. We used Perry's wars of the roses miniatures and the brilliant Lion Rampant rules, playing the scenario the messenger with the Duke of Buckingham counting as the messenger. On the south-east side was the Duke of Buckingham's retinue, led by one of his Knights of the shire, while Sir Thomas Malory's retinue deployed in the south west. Also, in the north-east corner, Malory's benefactor, Warwick, was deployed with his mounted men at arms.
The armies were as follows

Buckingham
- Mounted men at arms with Knight of the shire (commander)
- foot men at arms with Buckingham (messenger) - (we have reduced the foot men at arms to hit value on the attack to 4+, and their points to 5)
- foot men at arms
- foot sergeants
- crossbowmen

Sir Thomas Malory
- Mounted men at arms with Warwick (commander)
- foot men at arms
- foot sergeants
- foot sergeants
- longbowmen (archers)

The game opened with several unlucky activation rolls for Malory and a couple of good ones for Buckingham. Thus Buckingham's mounted men at arms spearheaded along the road for the fields in the north-west (through which Buckingham needed to leave through on his way home), while he himself with his two units of foot men at arms advanced through the woods.
Meanwhile Malory's men advanced, a unit of sergeants heading to defend the fields, while the others moved to head off Buckingham's advance.

While Buckingham's retinue was advancing, Warwick and his men at arms charged into the sergeants bringing up the rear.

The men at arms killed two billmen, but took a casualty themselves. Both units scattered away from the combat, battered.

At the other end of Buckingham's train, his mounted men at arms charged Malory and his men at arms, killing two of the footmen and taking a casualty themselves, but Malory was forced to back off from the fight.

Regrouping his men Malory led his men at arms and the nearby sergeants into combat with the mounted men at arms, though his own unit received a counter charge from the horsemen.

Following the bitter Malory had lost another man at arms and was now in retreat, battered, however his billmen had taken down two mounted men at arms and forced them back.

Regathering their spirits, the knight of the shire and his mounted men charged back into the bills.

But after the combat, though the bills had taken three casualties, the knight had lost his last two men at arms and fled from the combat with his life.

However while this combat had been raging in the open ground, Buckingham and his men at arms were advancing through the hedges and fields towards the last unit of billmen awaiting them.

Charging back into the billmen along with the other unit of foot men at arms, the gallant knight struck down two billmen single handed and sent them running.

Seeing Malory and his last two men at arms rushing to head off Buckingham, the Knight raced after them. Catching them in a field he engaged the three men, but was cut down from his saddle!

Back at the rear of the train, Warwick at last reengaged again, catching the billmen as they fled at the news of their leader's demise. The mounted men cut down three of the bills before charging on and leaving the others to continue their flight.

Warwick's men mauled Buckingham's retinue as the crossbowmen and billmen fled from the fight.

In the fields on the other side of the field however, a critical combat was ensuing. Buckingham and his men at arms, having sneakily evaded the billmen's schiltron had been caught in the back by Malory's men at arms and the billmen, while they crossed the last field.

The combat saw two of Buckingham's men at arms killed and one of Sir Thomas Malory's. Malory fled battered, while the billmen held firm. However Buckingham too fled, though in good order and towards his destination!

Having escaped Malory and his thugs Buckingham and his men at arms fled through the fields towards his seat - there he would be filing charges against the rogue knight!

A victory for myself and Buckingham's retinue, having successfully completed the scenario objective. However M, Malory and Warwick had inflicted heavy losses taking down my leader and mounted men at arms and cutting apart my bills and crossbows with a succession of charges and volleys of archery.
Another great game of Lion Rampant

by B

Sunday 11 October 2015

Averland war of Succession part 1 - clash on the road to Pfungzig - Lion Rampant

 
The Averlander war of succession (a bit of background) - by B
Averland, one of the most southern states of the Empire, has for many years been a turbulent province in which rich and powerful countries have vied for power.
Several decades ago Ludmilla von Alptraum, elector countess of Averland, died. However, the throne, instead of passing to her daughter, Marlene von Alptraum, the Iron Countess, was usurped by the head of the other most powerful family in Averland; Marius Leitdorf. Leitdorf was at the time supported by the Imperial Court in Altdorf. Thus did Leitdorf take power in Averland.
However several years later he was killed by an Orc warlord at the Battle of Black Fire pass, and the throne was again up for grabs. His sons were both illegitimate, while the eldest, Leopold, was killed in the Storm of Chaos, and the youngest was a drunkard.
His next of kin was thus his nephew, the far nobler Baron Kastor Leitdorf, however Marlene von Alptraum was still at large, and currently sheltering in the walled port-city of Hardenburg, on blue reach in south-east Striland, under the protection of its princes; the Vyshnevtsky's. Unlike Kastor Marlene had a son, Fenrec, and thus her succession also guaranteed future stability, but Kastor was still the favourite of many of the nobles.
Its this struggle strode the Vyshnvetsky's. Having poured money into expeditions to Ulthuan and Lustria, both of which ventures had been costly and unrewarding, they are now in considerable financial difficulty. To make this worse their main source of revenue, a monopoly over trade with the Dwarves on Blue Reach and up much of the river Aver, is threatened by the possibility of continued Leitdorf rule in Averland. With Marlene under their protection, they declare the forces of Hardenburg in support of her and, with Altdorf silent, cross Blue Reach.
Much of Marlene's support comes from the more rural gentry of the eastern towns and villages, many of the older noble families in Averland's main cities are also sympathetic towards her cause, while Kastor's support is mainly amongst the urban and commercial-riverside populace, as well as from much of Averland's most powerful nobles.
To add to this the two most powerful knightly orders in the region have also used the conflict to bring their rivalry to the field. The knights of the Blazing Sun, based in Nuln, and with chapterhouses in Averheim, support Kastor, while the knights of the Black Bear, allies of Hardenburg (their grandmaster Pietr, being heir to the Vyshnevtsky's throne) and with their chapterhouse in the Black Bear pub in Grenzstadt (in eastern Averland), support the von Alptraum claim.
Outside of the Empire the vast commercial and trade connections of Hardenburg and Averheim, have led to many foreign princes lending financial support to the two cause. Many Tilean and Estalian  princes support the Leitdorf claim, while the border princes, south of Averland, are split more or less evenly.
 
Fording the river the Hardenburger force divides into two, the main section heading  south towards Grenzstadt to join with the Black Bear knights and raise support among the eastern villages, while the other force, Hardenburg's famed marines, has headed for Pfungzig.
 
For this first game, simulating a clash between the vanguards of both armies, we would be using Lion Rampant rules, playing the scenario hold on tight' from the main rulesbook.
 
Forces
Averlander's under Baron Kastor Leitdorf
Baron Kastor....mounted men at arms
Knight's of the blazing sun....6 mounted men at arms
Town Garrison....12 foot sergants
Averland Halberdiers....12 foot sergants
Averland Crossbows....12 crossbowmen 

Forces of Hardenburg
Hardenburg Greatswords with commander...6 foot men at arms 
Hardenburg Greatswords....6 foot men at arms
Knight's of the Black Bear....6 mounted men at arms
Stirland Halberdiers....12 yeomen
Free company mercenarys....12 yeomen

The suburbs of the large town of Pfungzig, on the borders of Stirland and the Moot, were to be the first battle ground of the Averland war of succession. 
The Hardenburg army had crossed Blue Reach and begun to march on Pfungzig, in late summer, thus making the first move in the war. Baron Kastor quickly rushed to the aide of the town, gathering support as he marched. Arriving just in time to hear that a small force where about to take the main road into the town.     

The Hardenburger's arrived in the early morning, and looked at the quiet fields and houses suspiciously, no one was about, no workers coming out to the fields or traffic going into the town. The Knight's of the Black Bear where the first to move, riding straight down the road to the crossing. The spell was broken.  
 
Immediately as they halted, a troop of the knight's of the blazing sun charged out from the town and thundered into them. The knights of the black bear tried to counter charge but just as they where about to, Baron Kastor on his griffon swooped out of the sky and crashed in among them, his griffon grabbing a knight and his horse and flinging both to the ground!  
  
Three more where cut down by the knight's of the blazing sun, though one overreached himself and was killed by the two remaining knight's of the black bear before they retreated down the road.  
 
Meanwhile the rest of the Averlander's had appeared, halberdiers on either flank and a troop of crossbows on the left. The free company had advanced over a wall into a field, when a hail of crossbow bolts struck them, killing two of them and sending them into a panic and running back over the wall.      
 
The two knights of the black bear then charged into the baron and the knights, inflicting a wound on his griffon and killing one of the knight's of the blazing sun, sending them back over a field before they could reform. Baron Kastor on the other hand did not flee but killed both of them single handed (well and with his griffon!) lancing one out of the saddle while his mount tore up the other rider!     
 
The baron had gained a good deal of time holding the crossroad and that made it hard for the Hardenbuger's to have the time to take it back! (he gained 1 glory point for holding the crossroads at the beginning of the turn)   
 
The Stirland halberdiers then made a rush from the trees at the Baron, in the hope of killing him and ending the battle! Kastor did not try to counter-charge encase he found himself behind enemy lines and was charged by them. Holding his ground he fought them off, but was wounded a few times in the process.    
 
The Averland halberdiers then made a run across a ploughed field and charged into the Stirlanders, Kastor following up!         
 
The Averlanders hacked them to pieces with their halberds. Only one Stirlander, wounded and bloody, tore himself away and ran for it. 
 
But now the fresh and unbattled greatswords, with their commander, Captain Karayagin the Kislevite, charged at Kastor. Their greatswords wounding the griffon and sending him back across the fields.  
 
The Baron, although badly wounded, was never one to run from the battle, and charged back into the greatswords, killing one of the battle hardened soldiers before he was hacked out of his saddle and fell to the ground. His wounded griffon fled back to the town suburbs.      
 
Although their leader was down the Averlanders held on and did not flee the field. 
The halberdiers charged into the greatswords  and killed another of their number before being pushed back battered. The knight's of the the blazing sun had made a foolish charge into the other unit of greatswords and had all but one of their number killed.    
 
Time was running out, and the unit of greatswords had gained time on the crossroads (making the battle even in glory points)
The free company had been sent from the battle by the crossbows, who had done well in holding them off. The broken halberdiers on the ploughed field, had rallied and reformed, but the greatswords on the crossroads still had control. They had only lost two of their men to the charge of the knights of the blazing sun, and were now joined by the other unit.         
 
All rested on the one knight of the blazing sun and the fresh unit of halberdiers on the right. If they could push the greatswords off they might have a chance. The last knight charged and killed one of the greatswords before he had his horse cut down from under him, then the halberdiers charged! they killed anther of the greatswords and pushed the rest off the road, ending the battle!
 
Glory points 
Avlerand:1
Hardenburg:1

A blood filled Draw!

The remains of the Hardenbuger force left the field, only the greatswords having held, the rest fleeing to re-join the main force and regroup. Their leader, Captain Karayagin, was given another medal for his valiant hand to hand fighting in the action.   

The Averlander halberdiers returned to the town relatively intact. The crossbowmen caught their leader's griffon and carried their leader's body from the field, he had proved himself a brave leader, but whether he would survive his wounds was hard to say. They had beaten back the Hardenburger van, but been forced themselves to abandon the suburbs. 
 
    
by M