Having been told about Milton Keynes by the black wolf gaming club we also found them hosting a game table (you may remember our last battle with them at the musuem
http://warformiddleearth.blogspot.co.uk/2012/02/battle-of-kingsbury.html). Today they were doing a WW1 game involving Tanks.
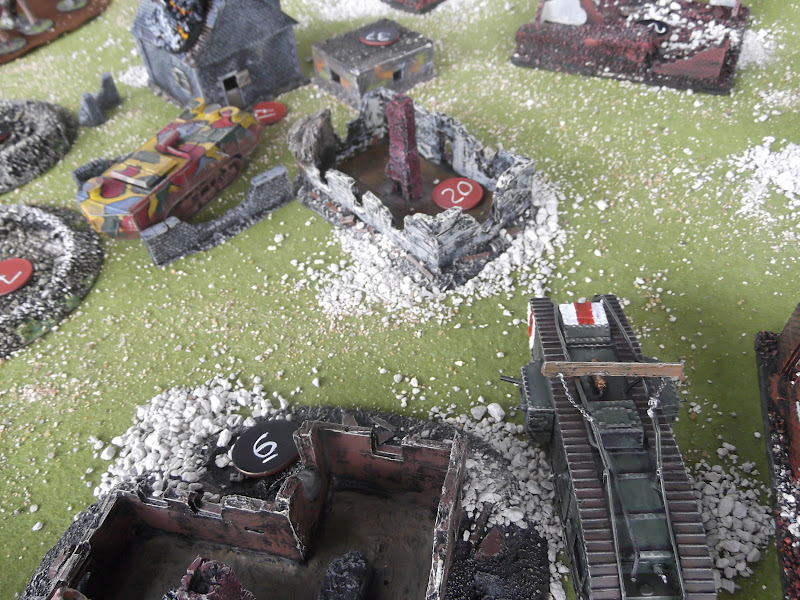
There was a large range of tanks to choose from with different abilites. The aim of the game was to get one of your tanks across the German trench. Of course it was not that simple. The German player randomly generated five units, which were hidden in one of the terrain pieces on the board. He did not have to reveal their location unless the tank successfully sited the piece of terrain.
Thee German's could move from piece to piece unseen until they moved into a piece of terrain that had been searched or they chose to attack.
For my first two tanks I chose a British Mark V* tank, very big one which was good at crossing trenches and was also very tough. I also chose a French St Chamond (which I can imagine was probably attached to the 2e Tirailleurs), a reasonably fast tank it is also equipped with a powerful weapon for detroying German tanks and artillery, however its trench crossing skills are poor and its armour is weak.
These were our tanks profiles. The german units also had one each as well. You rolled your visibility dice against a German D6 to site terrain and you rolled your shooting dice against their armour and vice versa. When the big guns cannot see the target or you are right on top of the target or vice versa you roll your CC (close combat) against their's.
When rolling to move you roll two dice for your speed and pick the highest. After turn three if a double is rolled however your tank breaks down and you must roll a 4+ to restart it next turn.
The trench crossing dice is rolled when you attempt to cross the trench and the chart corrisponds with your opponents dice roll should they beat your armour with shooting or your CC with their's.
Once a tank took three hits it is out of the game as the crew ditch.
My St Chamond started off the game spearheading forwards into the shelled ruins of the village, siting crater No. seven which happened to contain a german machine gun team. We opened fire on them and blew them out of the crater. A good start.
With the arrival of the German tank along the road the Mark V* put off course to head up the assualt alongside the st chamond. It then sited 20 which was empty before the st chamond sited 17 which contained four grenadiers, who were promptly blown out by the French.
The Mark V* then sited no. 24 which also contained four grenadiers who were also blown out of their hiding place. Now all that was left for the Germans was one last unit and their tank.
The German tank quickly opened fire on the St chamond, blasting through its side armour and leaving it stationary as the shocked crew got their wits about them.
However both the Mark V* and the St chamond continued their advance on the Trenches, the Mark V* spotting pill box 27 and continuing over the barbed wire.
The German tank again opened fire on the allied tanks, narrowly missing the Mark V* with its main cannon.
But with this last shot missing the Mark V* was onto the trenches and over them like no body's buisness! Victory for the British as the Mark V* became the secons tank of the day to cross the German trench.
Far too late the grenadiers showed themselves as the dashed across open ground for the st chamond.


No comments:
Post a Comment