Monday, 21 May 2012

Landships: the rules

Here are the rules for the game landships that we played whilst at MK campaign 2012, run by Black wolf Wargaming. Big thankyou from the guys for these rules and I hope that some of you may be able to recreate this game yourselves.

Landships rules

You will need
Some measuring sticks marked in inches
D4, D6, D8, D10, D12 sided dice
Some identification markers, numbered for the terrain

Set the table up with lots of terrain for the Germans to hide in, leave about 6” between each terrain piece.  I leave 3 feet from the allied tank start line to the trench

Number each terrain piece, including sections of trench, I numbered each 12 inches of trench.

The allied player picks his tanks

The German player picks two grenade groups and out of a hat randomly picks two locations for them to be in.  Note the number of where they are on their playsheet.

The German player then randomly with the cards face down picks one extra unit from his pack of cards per allied tank in the game (listed below) The German player can position these choices where he likes noting it on the playsheet.

Our German pack of cards contained
8 grenade groups
1 tank
2 field guns
1 anti tank rifle
2 machine guns

Each unit should be allocated a card, which is then used to decide who goes in which order.

Turn the cards and each player does his action.  The allied tanks can

Spot into a piece of terrain using their spotting dice. Spotting can be done at the start of a turn or at the end of the move.  A tank cannot spot if in close combat.  I decided at the time which dice the Germans in the terrain would have depending on how close the tank was.  Roughly

Spotting a shell hole German uses D4 if close or D6 if any other distance
Spotting a flattened building or a wood German uses a D6 all the time
Spotting a flattened building German uses a D6 all the time
Spotting a damaged building German uses a D6 close up and a D8 if any other distance
Spotting a trench D8
Spotting a pillbox D6 close up or D10 at any other distance

Whenever a German unit fires it must be put on the table

Move
Tanks roll 2 D6 dice and move with the highest dice unless Whippet which moves the total distance on the two dice and adds 1” to each dice.  After the first two turns we said any double is a breakdown.  In the next turn roll 1 D6 and on a 4,5,6 engine is started and the tank can move again

German grenade teams MG teams and anti tank rifle teams move from adjacent terrain piece to adjacent terrain piece so the German player moves them by writing the new location on his sheet.
The field gun is located at the start of the game and apart from turning it may not move. 

Shoot
This is for tanks with a big gun only.  If you have spotted Germans or they have appeared by shooting you can fire at them.  The tank rolls its shoot dice, going down a grade of dice if it moved first (ie from D8 to D6) All Germans have an armour dice to roll against the tank.  This goes up a grade if they are in cover and up two grades if they are in pillboxes

Close combat
 this happens with Germans within 6” so grenade groups who have jumped out or field guns if you get close enough.  Each side simply roll their close combat dice and highest wins

Destroying the enemy
Whoever wins the shooting or close combat inflicts a hit on the enemy.  The winner rolls a dice and the loser reads the result from his list at the bottom of the playsheet

Grenade groups, mgs and anti tank rifles, odd numbers the unit is out of the game for good, even numbers they are removed but the German player pulls a new location for them at random.  Field guns and tanks take damage as per the list, after three hits in total they are overun and out of the game.

Germans hitting tanks
The German player rolls the following dice to see the effect of their hit

Grenade groups roll a D6, you will notice the damage they can inflict is mostly superficial but if they roll 5 the tank loses a track and can only spin round

Anti tank rifles and Machine guns roll a D8, they could kill a tank with a good shot

Field guns and tank guns from the German tank roll a D10, they have a chance to cause real damage


Useful information

Tanks
The tanks came from Airfix and Emhar plastic kits and from Early War Miniatures who sell quick build resin tanks (www.earlywarminiatures.com.)
Airfix and Emhar also sell WW1 plastic figures, a good way of getting into wargaming
The buildings were home made and card kits for railway modelling and some resin ones from www.lancerminiatures.com

Saturday, 19 May 2012

Battle of the south undeep

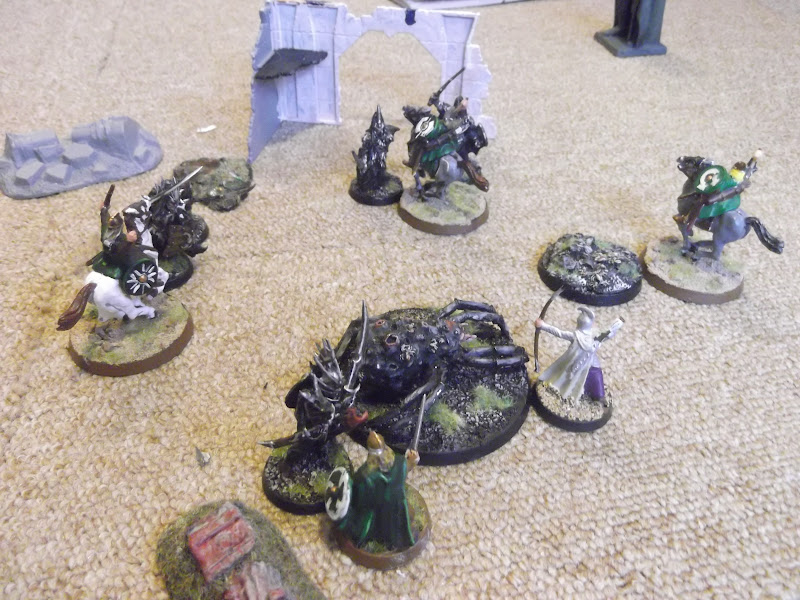
Having had reported to them that a host of orcs and evil men were crossing the river at the south undeep, Theoden Thengel-son gathered the Eoreds of the riddermark and rode for the Anduin ford. Along side him rode Eomer Eomund's son, marshal of the riddermark and Guthlaf, warden of the king's halls. Whilst crossing the entwash they were joined by the dwarven host of Feldunost and their King; Dwalin. Then Whilst overnighting in the east Emnet, Marshal Elfhelm and his Eored arrived to the king's standard, from running the gauntlet along the gap of Rohan, along with two elves from the grey havens. With the host of riders and warriors now assembled they made for the south Undeep to find that the host of Udun which had forded the Anduin was constructing a fleet of flat bottomed ships, to float down the river to Osgiliath.
Remembering the ancient alliance with Gondor and outraged that the hosts of the dark one were in his lands, Theoden rallied his host and lead the attack.

The game was a wipe out with 1000pts aside. The armylists were as follows:

Army of Udun
Knight of Umbar
Mouth of Sauron
Spider Queen
Orc captain
Black numenorean marshal
5 morgul knights
15 black numenoreans
12 orc spearmen
4 orcs with two handed weapons
8 orc trackers
1 mordor siege bow
1 mordor troll


Host of the Emnet
Theoden thengel son
Eomer eomund son
Marshal Elfhelm
Dwalin, Captain
Thorin Oakenshield, captain
Murin and Drar
Guthlaf, royal guard
15 riders of rohan
8 dwarf archers
2 dwarf shield bearers
6 dwarf warriors
6 dwarf warriors with two handed axes
2 elf archers

The opening moves saw Theoden and his host of riders fall back from what had appeared to be a central charge for the morgul knights and the troll (I am known for my Rohirrim charges towards the most deadly opponent, ride to ruin and all that). Instead the Dwarves under Murin, Drar and Dwalin threw up a wall in front of the riders.

 Lead by the inspirational arrows of the two elves and Drar, the rest of the dwarf bowmen open fire into the charging morgul knights, killing one outright and throwing another from his mount. With another round of shooting this would be enough to completely blunt the knight's charge.

 However the ambassador of Sauron and the crusading ringwraith redirected their knights for the flank away from the archers, but were quickly halted by Dwalin and his dwarves, who ran up and hacked down yet another of the knights as he galloped.

Thorin Oakenshield and his band of dwarves struck out from the bushes at the weighty forces on the left flank. Thorin and Bombur both running in and splitting apart a black numenorean.

With the Knight's charge blunted in two turns by the dwarves, Theoden now let slip his cavalry on the Right flank. Dwalin and his dwarves held up the remaining knights and their leaders whilst Murin, Elfhelm, Guthlaf, Eomer, Theoden and two dwarves surrounded the Troll, and hacked it down under a bitter number of blows. With the morgul knights all but nullified and the troll slain to not a single casualty on our part yet, Theoden's tactic of holding back seemed to be paying off. However he had now committed his riders to the right flank and they would have to break the black numenoren line and hope Dwalin held the rinwraith off their flanks till then.


The Rohirric advance was beginning o take hold and the trackers now found themselves at the horsemen's mercy. The three troll slaying heroes of Rohan now directed their attacks of the knight of Umbar, but they were thrown back by the spectre as he showed them his steel. The black numenorean shield wall was also proving equally difficult for the rohirrim to break, and they burst around its flanks.

On the left flank the dwarven attacks had descended into naught but a brawl with the spider queen and the marshal's warriors fighting an all out skirmish with the dwarves and their archers, lead by Thorin, Murin and Drar. However the spider had been wounded by the Dwarves but Thorin had met his match in the Black numenorean marshal.

Thorin Oakenshield and Fili battle hard against the wicked Marshal and his fellow warrior, supported by the cowardly orc lackeys! But the Dwarves threw them off time and time again!

With rather a turn of events the Rohirrim swept aside the orc trackers, to fall upon the shield wall's flanks and roll it up with their enfilading charge. But despite the carnage of the rohirrim's charge, just as much carnage was caused by the orcs who let rip their bolt thrower into the combats slaying two dwarves and Theoden's horse. However the right flank was clearly won, with just a ringwraith and one orc to protest.

But the left brawl was going on just as firecily. It was complete chaos as the dwarves battled with teh Black numenoreans and the spider queen fought off all assailants. However, with the carnage of the right flank the evil forces had lost their spirit and were well and truely broken, the bolt thrower crew sneaking off to the ford.

The Rohirrim now continued the charge on the left flank, riding down the evil men and orcs alike and dispersing the combats.

 The ringwraith, falling back and blasting off darts and immobilising spells for all he was worth, suddenly found two rohirrim atop of him. With but one will left they defeated him in combat and he disolved into nothingness before their blows fell.

The ringwraith was banished, but the Rohirrim and dwarves were now broken and a few of the more mean dwarves fled the field of carnage, to leave Thorin and Dwalin battling the warrios of teh spider queen.

From what had looked like a succesful victory the warriors of the Emnet quickly fell. Dwalin was cut down, as was Thorin and so too was elfhelm. Kili battled on against the tide of evil and teh last elf continued to let off his arrows at the Umbaric Marshal.

The last three riders and the lone elf stood beside their king in the face of the superior forces. The Marshal brought Theoden to his knees, dragging him off for the high ransom the Rohirrim would pay for his safe return, whilst the other riders were slain and the elf died at the hands of the spider queen in a self sacrificing last stand to save the king.

But in the end the servants of Sauron stood tiumphant, though numbering but three men, an orc and the spider queen they could not pursue their voyage down stream. But Sauron's coffers were richly filled with the money earned for the king's ransom along with the horses and arms of the fallen warriors.

Sunday, 13 May 2012

ww1 landships: game 4

I now took control of the Germans as the German player had gone to have a look around the great traders stalls at MK campaign. I was playing the Umpire and my mother again. They took control of the Mark V* and a whippet tank.

I generated three units of German Grenadiers, great close combat troops but easy to destroy in CC
I also generated a Field gun, very good at shooting but with average armour and CC It can't move and it detroyed after three hits as of a tank.
The last unit I generated was a Machine gun team. Quite good shooting but terrible CC and armour as of the Genadiers.
I ambushe the speedy whippet early on with a band of Grenadiers, but it destroyed their unit with machine gun fire and continued motoring on. One unit lost was a bad start.
The whippet dashed to the cover of the ruined house and was immediatly beset upon by four more grenadiers. It easily threw them off and blasted them with its MGs.
However then the last band of Grenadiers lept out at it from the same building and blasted it, this time damaging it. The whippet proceeded in breaking down but did manage to clear out the last of the grenadiers.
All this time the Mark V* had been held up by the German MG crew but it had now blown them out and was heading for the trenches.
The Whippet got moving again, but by that time my Field gun was ready and I opened fire on it with my heavy shells, taking out a hole in its armour and stopping it in the centre of the road for a moment.
The Mark V* meanwhile was racing up towards the field gun, firing off its guns at their position in the ruins, but missing the target.
The Whippet then broke down again, it was heavily damaged and stranded in the middle of the road in direct view of the field gun.
The Mark V* was still going for the field gun, hanging back and letting lose at it with its guns, hitting it but doing minimal damage.

By now the Whippet had been ditced by its crew and was lying smoking a few paces away from teh trench, now the field gun could turn its attention to the Mark V*.

 But the Mark V* was quicker and blasted apart the gun with a barrage of gun fire from its sponsons.

It was free to go for the trench now, however as it began to cross the German trench it broke down, the German's blasting it and ripping off the armour. It had failed and the German's stood victorious.

It was a great game they had come up with and one I enjoyed playing. It was a great pleasure to head up three assualts on the trenches and also to defend it.
Look out for our ECW game in October


ww1 landships: game 3

With the return of my Family from John Lewis (which seemed to be a lot more interesting than a wargaing convention), my mother decided to join in. I took the St Chamond and my mother took the Mark V*. It was the same combination as I had used in the first game.

I decided that the St Chamond probably had enough armour to take a hit from a German tank and it was armed with a powerful anti tank rifle so I decided to go straight across the road with it. A very direct route for the fast French tank to get to the trench.
However I was ambushed before I could get very far by some Grenadiers in the cafe. But the French tank easily blasted them apart with its machine guns and escaped un harmed.
As I got close to the road there was no sign of a German tank, but I did manage to site the close by ruin and open up on the German grenadiers inside with my Machine guns, blasting them out. The St chamond was doing well, having destroyed two grenadier squads and being almost half way to the trench un harmed. The Mark V* had also taken out a German machine gun post.
As the St Chamond approached the road a German field gun came into view and began to fire off its shells at us!

As the smoke settled four more German grenadiers cam running at us from behind, and blasting our armour from one of their grenades.
The Field gun the let off with another shell at the St Chamond, but luckily missed. Our easy progress was now looking bad. It would be rather difficult to get to the trenches now.
The Grenadiers began to close in on us, blasting off the St chamond's tracks with a grenade and leaving it immobile in the field, and at the mercy of the field gun.

And with one last blast the Field gun took it out, the French crew ditching it and surredering to the Germans. The field gun then turned its fire on my mother's Mark V* but it managed to get through and it successfully crossed the trench.


WW1 landships: game 2


Perhaps a little over confident after my last great victory I decided totry my hand at getting across the trenches with a French FT 17 this time. Good at speed and perhaps quite tough the FT 17 has apauling close combat and trench crossing and rather average everything else.

I also took a Mark IV male. Very good armour and quite good shooting ad visibility its speed was average as was its CC but its trench crossing was quite good. It was a rather average tank and not an  obvious choice.

My Tiny French FT 17 (the first turreted tank seen on the field) and Mark IV male line up for their try at the trenches.
As the British steered their mark IV along the road towards the trenches, however they failed to site the German grenadiers in the Cafe and they lept out and chucked their grenades at it, damaging it with the explosives.
The FT 17 on the other side was also ambushed by German grenadiers, who lept out of one of the craters and also damaged it.
The damaged Mark IV quickly abandoned the road, leaving the German grenadiers to disapear back into the ruins, as the German tank appeared trundling along the road.
The German storm troopers continued to attack the FT 17 blowing off it's tracks and leaving it to be ditched by its crew! It was not looking too good for my objective as the French ditched their tank, leaving but one damaged Mark IV to deal with the entire German force still intact
As the Mark IV approached the barbed wire it came under assualt from four more German grenadiers, who stunned the crewmen and damaged the guns with their explosives.
Whilst the Mark IV was immobile four more German grenadiers lept out from one of the ruins behind the tank and ran to assualt the Mark IV before it got going for the trench again.
They quickly threw their bombs at it and blew the crew out, leaving the ruined tank  on the barbed wire with my objectives incomplete.
Obviously my overconfidence with the FT 17 and Mark IV had not worked out.